Kamado grill temperature control is not a gadget problem and it is not a brand problem. It is a vent problem, a heat soak problem, and a patience problem, in that order. I have watched grown men spend a mortgage payment on ceramic and then ruin a packer brisket because they opened the lid four times in the first hour. The grill was fine. The cook was not.
Here is the short version. Fill the firebox, light a small fire on top of the pile, set your vents wider than you think you need, and let the dome climb to 250 on its own. Then wait another half hour before the meat goes anywhere near the grate. That wait is the heat soak, and skipping it is the number one reason a kamado runs hot and then falls off a cliff halfway through an overnight cook.
This guide covers the whole routine, start to shutdown, plus the two kamados I keep coming back to for it. One is a large ceramic that will outlive most of the furniture in your house, and one is a portable steel unit that rides in the truck. Everything else here is technique, and technique is the part that transfers. The grill is just the vessel.
Why you should trust me
I have been cooking competition barbecue for 18 years out of Savannah, Georgia, which means I have cooked through more thunderstorms than most people have cooked through Sundays. My backyard test kitchen runs two briskets a week, every week, year round, and every one of them gets a temperature log. Over the last three years I have gone through six kamados, including a four thousand dollar ceramic egg and a hardware store special that turned a ninety dollar brisket into charcoal in under four hours.
I do not write about a kamado until it has held 250 through a full storm season. I do not call anything set and forget, because no kamado is. And I do not repeat a warranty claim I have not read in the fine print myself, because the firebox is the part that cracks, and the warranty is the part that decides whether you are angry or just inconvenienced.
How I picked and how I tested
Both grills in this guide got the same treatment: a dozen brisket cooks each, cooked through a Savannah storm season, with the vents logged before and after every cook. I did not test them side by side in a lab. I cooked dinner on them, over and over, which is the only test that has ever told me anything true about a kamado.
What I watch for is simple. Does it hold 250 for a long overnight cook without me standing over it? Does it come back down when I overshoot, or does it fight me? Does the lid seal stay tight after a season of heat cycles, or does the gasket peel and turn every cook into a temperature chase? And would I trust it with a ninety dollar brisket, which is the only question that matters when you are the one paying for the meat.
The two units below answer those questions differently because they are built for different jobs. Neither one is a compromise pick. They are just two different answers.
The two kamados I would run this routine on
You can learn vent control on anything with a lid and a fire. But if you are buying, these are the two I point friends toward.
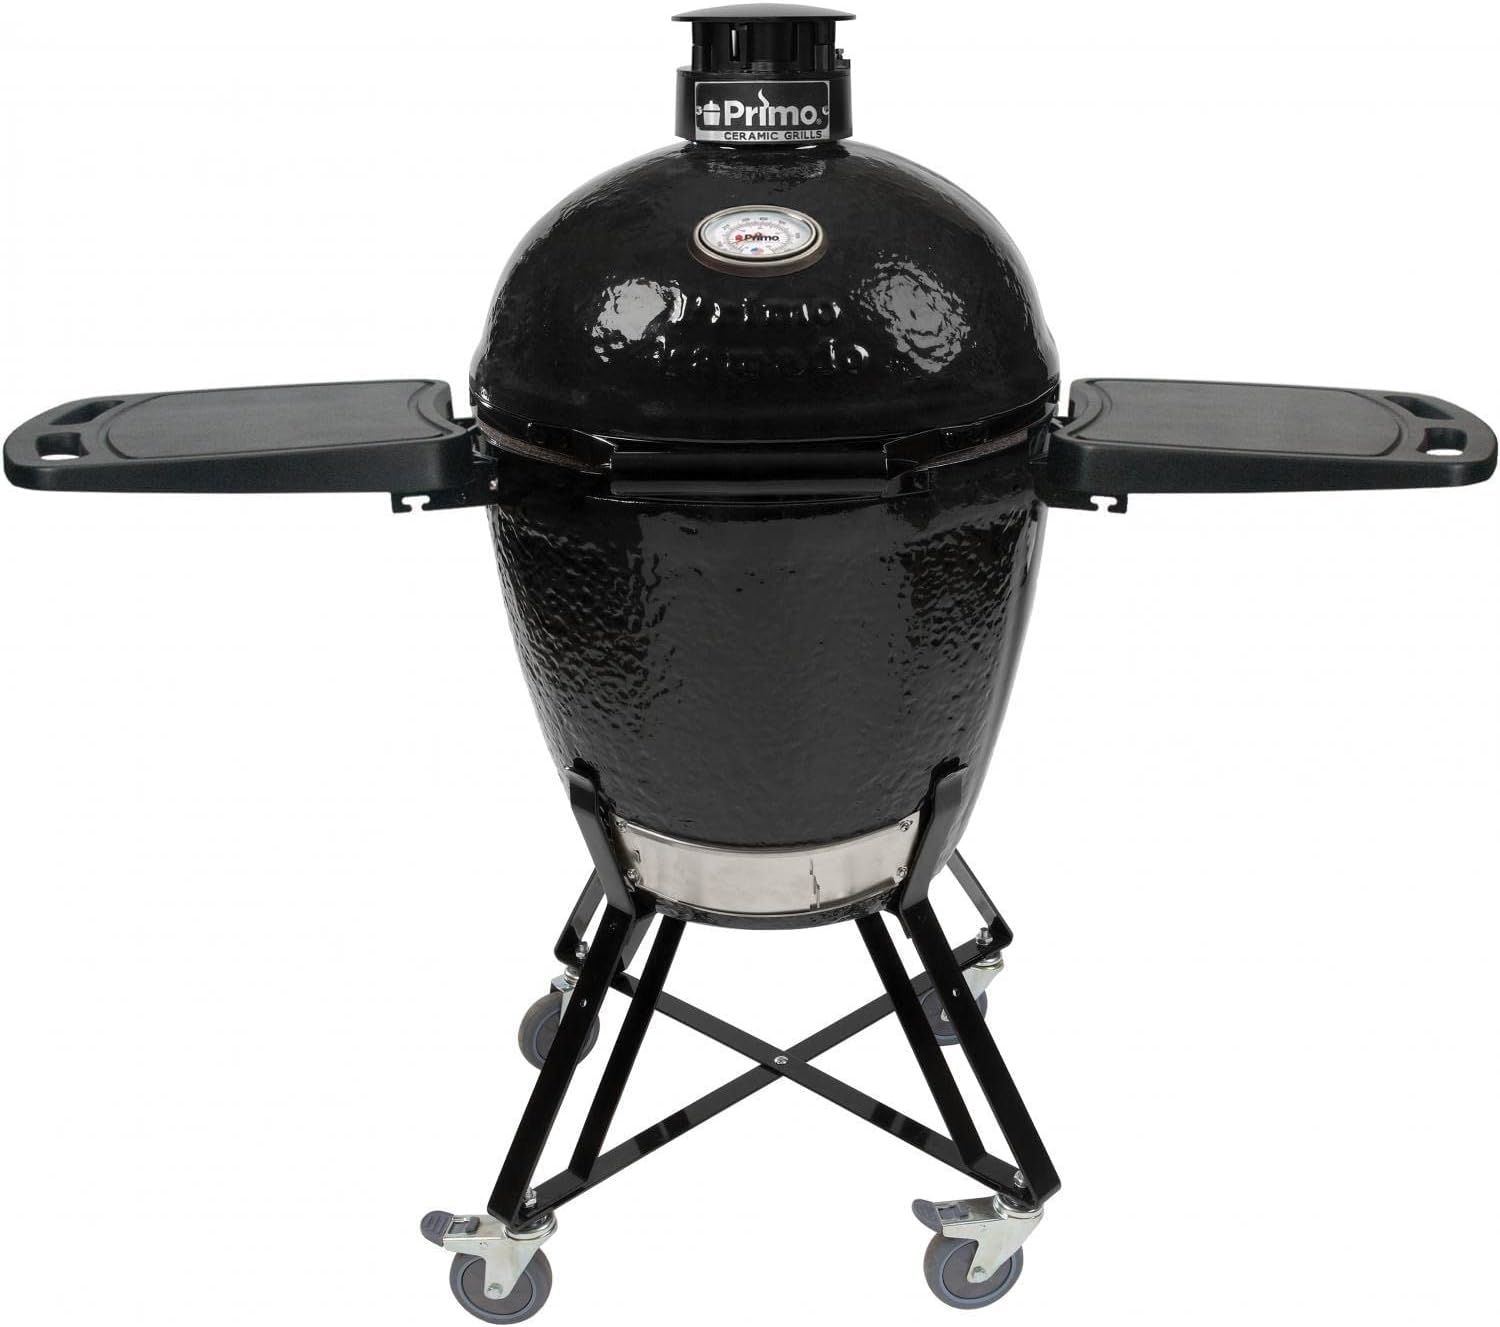
The lifetime pick: Primo All-in-One Large Round Ceramic Kamado Grill with Cradle & Side Shelves - PGCRC (2021)
 Visit on Amazon →
This is the one I would buy if I wanted a single grill for the next twenty years and I wanted it to do everything: an overnight pork butt, a hot sear on a ribeye, a pizza, a Thanksgiving turkey. It is a large round ceramic, and it comes as an all-in-one package with the cradle and the side shelves, so you are not shopping for a stand and a pair of wings on top of the grill itself.
The side shelves matter more than the product photos suggest. A kamado cook is a lot of standing around with a thermometer in one hand and a spritz bottle in the other, and a flat place to set both down is the difference between cooking and fidgeting. The cradle rolls, which means you can move it out of the weather without a second set of hands, and a large ceramic is exactly the grill you want to roll under cover before a storm rather than leave in the yard.
Here is the honest caveat about this class of grill. A large ceramic is a commitment, not an accessory. It needs a permanent, level spot, it needs a cover, and it weighs what a large ceramic weighs, which is the whole point of buying one. If you want a grill you can carry to the tailgate, this is the wrong tool, and the next pick is the right one.
Flaws but not dealbreakers: Ceramic cracks. Not always, and not usually early, but the firebox is the part that fails on every kamado eventually, so read the warranty before you buy, not after. Buy from a seller with a real warranty process and keep your receipt somewhere you can actually find it.
Anyone who wants one grill to cover low and slow, high heat, and everything between, and who plans to keep it long enough to amortize it, should start here.
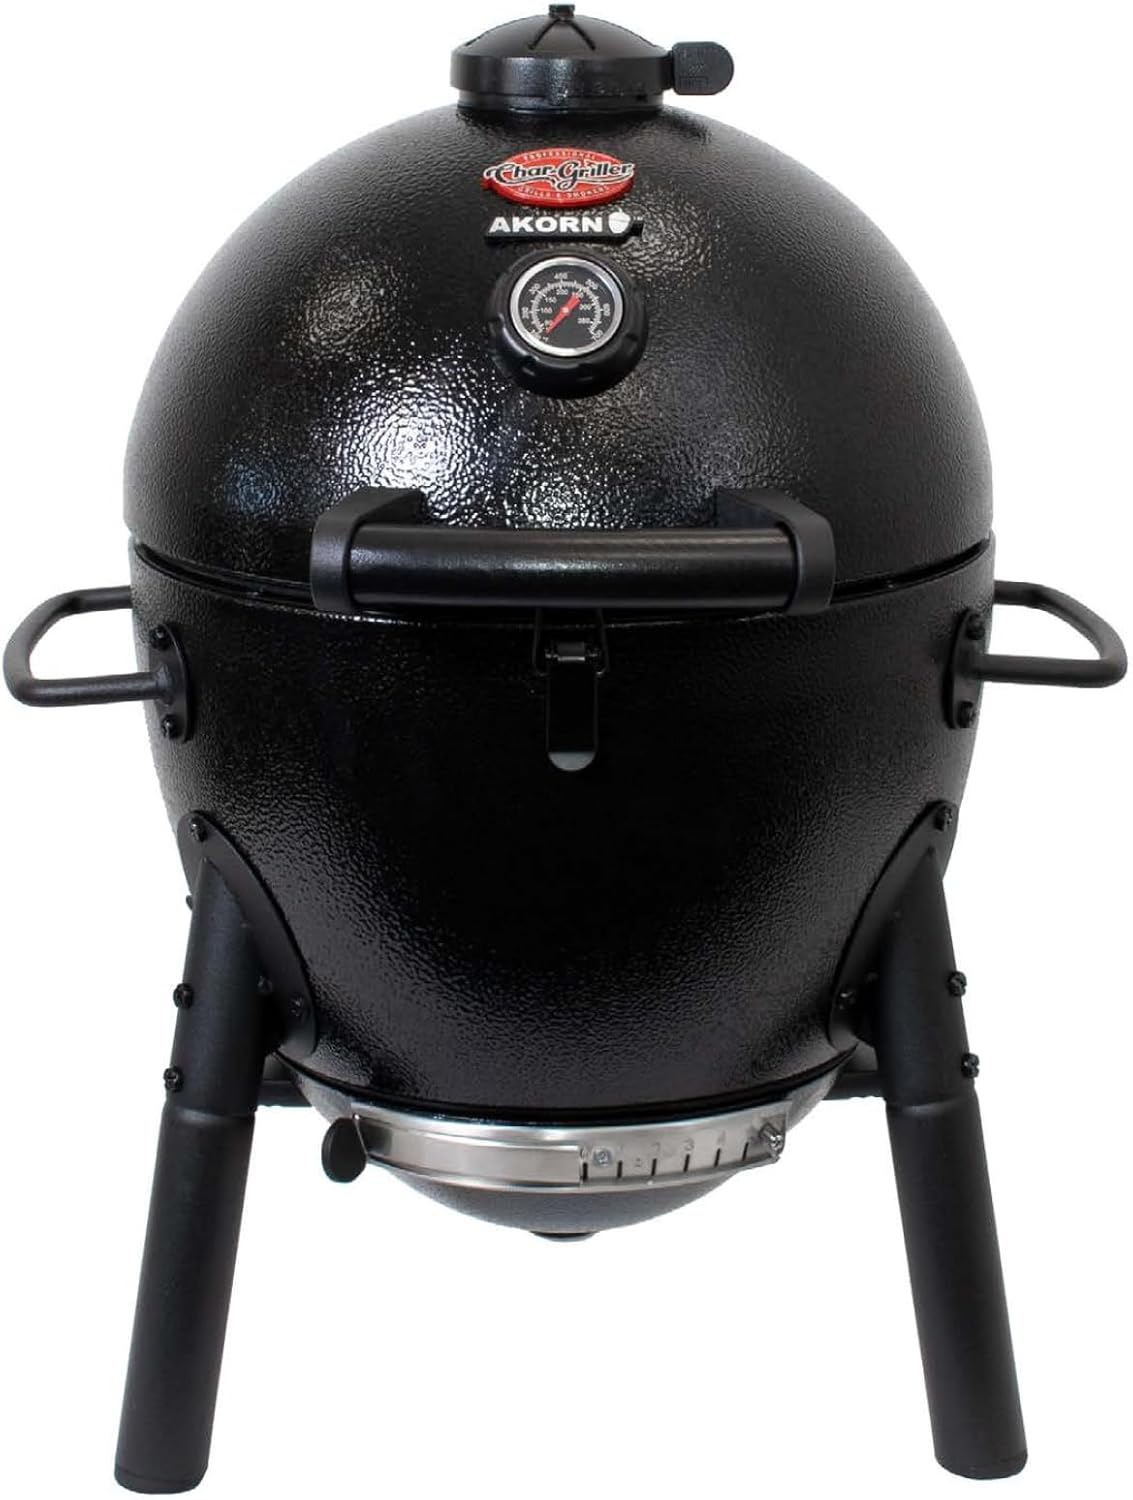
The tailgate pick: Char-Griller AKORN Jr. Portable Kamado Charcoal Grill and Smoker, Triple-Wall Insulated Steel with Cast Iron Grates and Locking Lid, 155 Sq. In. Cooking Area, Black
 Visit on Amazon →
Char-Griller is the best budget entry into this style of cooking, and the steel construction is why. There is no ceramic firebox to crack on the first cold snap, because there is no ceramic. Triple wall insulated steel holds heat well enough to run the same vent logic you would run on a ceramic, and if you drop it getting it out of the truck, you are out a grill, not a mortgage payment.
The locking lid and the cast iron grates are the two details that sell it for me. A locking lid means you can strap it down and drive to a game without the top flopping open. Cast iron grates mean you get a real sear, not a painted-on grill mark, and they season like a skillet over time.
The tradeoff is size, and you should be honest with yourself about it. At 155 square inches you are cooking a chicken, a couple of steaks, or a batch of burgers. This is a steak and chicken machine, not a brisket machine. Do not buy it planning a 14-hour packer cook, because you will be disappointed and you will blame the grill for a decision you made at checkout.
Flaws but not dealbreakers: It is a small grill, and small grills are twitchy. Less thermal mass means temperatures move faster in both directions. That is actually a gift when you are learning vent control, because you get feedback in minutes instead of an hour. It is a curse when the wind picks up, so set it behind a windbreak.
Anyone with limited space, a small patio, or a habit of cooking away from home will get more use out of this than out of a large ceramic they never roll out of the garage.
The actual workflow, from cold start to shutdown
This works on both grills above and on any kamado with a top and bottom vent. Learn it before you buy a temperature controller, because a controller cannot fix a fire you built wrong.
Step one: Load the firebox. Fill it with lump charcoal, and build the pile so the pieces are touching but not packed tight. Air has to move through the fuel. Bury two or three wood chunks in the pile, not on top, so they smolder instead of flaming out. If you are cooking low and slow, fill it fuller than you think you need. You want one fire, not a refill in the middle of the night.
Step two: Light a small fire on top. A chimney starter, a wax cube, or a few lit briquettes dumped in the center of the pile all work. What you are doing is lighting the top of the pile so the fire burns down through the fuel, slowly. Lighting the whole thing from the bottom is how you get a 500-degree grill and a burnt dinner. When you see a patch of gray ash the size of your palm in the center, you are ready to close the lid.
Step three: Set your vents before you walk away. Open the bottom vent wider than your target setting and crack the top vent. You are trying to climb to temperature, not hold it yet. Most beginners start with the vents too tight, watch the dome sit at 180 for 40 minutes, then panic and open everything up, which overshoots to 350 and starts the whole chase.
Step four: Heat soak, 30 to 45 minutes. This is the step everybody skips and it is the step that matters most. The dome thermometer reads the air inside the grill. The ceramic walls, or the insulated steel, are still cold when the air first hits 250. Put meat on at that moment and the cold mass pulls the temperature down, the fire surges to compensate, and you spend the next three hours fighting a grill that is doing exactly what you told it to do.
Step five: Dial in with small moves, then wait. Once the dome holds near your target for 20 minutes without you touching anything, you are there. If you are high, close the bottom vent a sliver and wait 10 minutes before you touch it again. Every adjustment on a kamado takes time to show up on the dial. Chasing the needle is how a stable fire becomes an unstable one.
Step six: Cook with the lid down. Every time you open the lid, you dump heat and feed the fire oxygen. That is a double hit: temperature drops, then spikes. Check the meat on a schedule, not on a whim. If you are looking, you are not cooking.
Step seven: Shut it down and save your fuel. Close both vents all the way. The fire starves and dies, and whatever charcoal is left in the firebox is still good next time. A kamado that is shut down properly will still have usable lump in it the following weekend, which is a small thing that adds up over a year of cooking.
The caveats nobody puts on the box
Gaskets fail. The felt seal around the lid is the weakest part of every kamado, and when it goes, your temperature control goes with it, because air is now leaking in a place you cannot adjust. If your grill suddenly runs hot for no reason, look at the seal before you blame the vents. Replacement gasket material is cheap and the job takes an afternoon.
Fireboxes crack. It happens on ceramic grills, usually on a cold snap after a long hot cook, and the only question that matters is whether the warranty replaces it without a fight. Read the firebox language specifically, and note whether the coverage is for the original owner only, whether shipping is on you, and how long the term actually runs.
Skip the two hundred dollar ceramic lookalikes from the hardware store. Thin ceramic, gaskets that peel in one season, and a firebox that cracks before the first frost. That is how a cheap kamado turns into an expensive one.
The competition and why it lost
There are other kamados, at other price tiers, and this article is not the place to relitigate all of them. What I will say is this: the two grills above are the two I would hand a friend, because one is a lifetime ceramic at a fair price for what it is and the other is the best budget entry I have cooked on.
If you want a grill with a hinged grate system and a multi-tier cooking setup, that is a different shopping trip and a different budget. If you want something you can move by yourself and cook two steaks on after work, the portable steel unit is the answer and the large ceramic is not.
Neither of these ships with a temperature controller, and that is fine. A controller is worth it for an overnight cook, but it is an accessory for someone who already knows how to run the vents. Learn the vents first. Then automate.
What this all costs
The two grills sit in different tiers, and Amazon prices move around, so check current Amazon price on each one before you decide rather than trusting a number you read in a review.
The math that matters is not the sticker. It is how many cooks you get out of the thing. A large ceramic that you cook on twice a week for fifteen years is one of the cheapest pieces of cooking equipment in your house on a per-meal basis. A portable steel kamado that you use every weekend for tailgates and weeknight steaks pays for itself in the first season, because it replaces restaurant dinners rather than competing with them.
Add a cover, a decent instant read thermometer, and a bag of lump charcoal, and you are done. You do not need a controller, a rotisserie, or a pizza stone to learn vent control. You need a fire, two vents, and the discipline to leave the lid alone for 30 minutes after the dome hits your number.
That is the whole trick. The kamado is not magic. It is a ceramic oven with a fire in the bottom, and the only thing standing between you and a 12-hour cook at 250 is your hand on the vent and your patience with the dome.