Most kamado grill setup guides end right where the real work starts. They show you a crate, a lid, a bag of lump charcoal, and a lit fire. Then they hand you a $90 brisket and wish you luck.
I have cooked two briskets a week for the better part of eighteen years, first on a rusty offset in a parking lot outside a competition in South Georgia, and now in a backyard test kitchen in Savannah where the humidity sits at 80 percent and a thunderstorm can roll in with twenty minutes of warning. I have watched a new kamado with a badly seated gasket swing 75 degrees on a pork butt. I have watched a hardware store egg crack its firebox on the first cold snap in November.
The difference between those two cookers was not the money. It was the setup.
A kamado grill setup comes down to four things: a ceramic body that is sound, a lid that seals, vents you have actually learned, and a heat soak long enough that the dome stops moving. Get those four right and the cooker will hold 250 through weather that would shut down a cheap offset. Skip them and you will blame the grill for something you did on day one.
Why you should trust me
I have been cooking competition barbecue for eighteen years and I have run everything from a $200 drum to a $4,000 ceramic egg. My test kitchen in Savannah runs year round, two briskets a week, every week, with a temperature log on every cook. I have spent three years and six kamados figuring out which ones hold temperature through a Georgia storm and which ones turn good meat into charcoal.
What I care about is boring. Ceramic thickness. Gasket quality. Whether the firebox cracks in season one or season five, and whether the warranty replaces it without a fight. Brand names are the last thing on the list. Two eggs at the same price can be very different pieces of ceramic, and the only way to know is to look at the wall thickness and the weight of the thing before you ever light it.
What you need before the first fire
You need four things: the cooker, a bag of lump charcoal (not briquettes, they ash too heavily in a kamado), a way to light the top of the pile, and a digital thermometer with a grate-level probe. The dome thermometer that comes on the lid is a reference, not a measurement. It reads the air at the top of the dome, not the air at the meat, and on a long cook those two numbers can be 40 degrees apart.
The fifth thing, the one most people skip, is a flat surface for searing. More on that below.
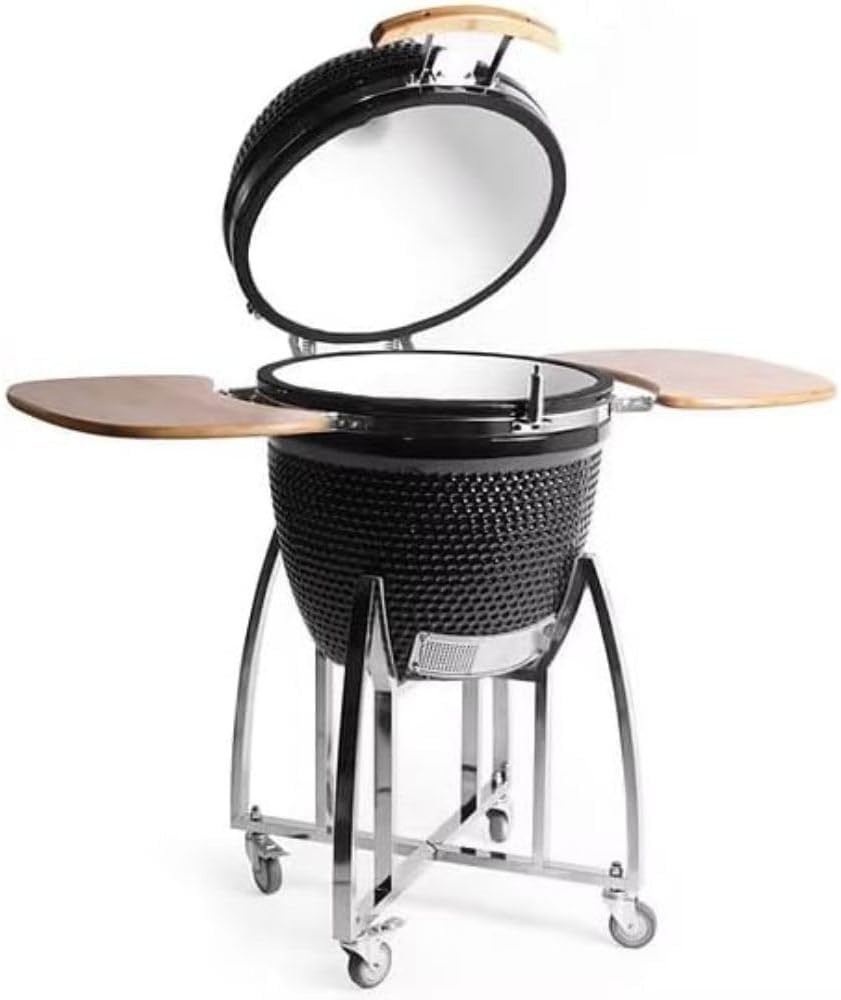
The cooker: Kokomo Grills Kamado Ceramic BBQ Grill with Stainless Steel Grid and Folding Shelves
 Visit on Amazon →
This is a full ceramic kamado with a stainless steel cooking grid, folding side shelves, and a built-in dome thermometer. The three details that matter on a cooker like this are the ones you can check with your hands before the first fire. Open the lid and look at the firebox: no hairline cracks, no chips on the rim, and it should sit flat in the base without rocking. Run a finger around the gasket and make sure it is glued down evenly all the way around, with no lifted corner where steam can sneak out. Then look at the bands and the hinge. The lid should come down square, with an even gap on both sides.
The folding shelves are the feature I would use most. In a small backyard, side shelves that fold down mean the cooker fits against the wall when it is not in use and gives you a landing spot for a sheet pan when it is. The built-in thermometer is fine for a quick glance through the top vent, but I still run a probe at grate level.
Who it suits: someone who wants one ceramic cooker that will handle a 14-hour pork butt and a 600-degree steak sear without buying a second grill. If you are brand new to charcoal, read the vent section below twice before you light it.
Flaws but not dealbreakers: A kamado this size is heavy, and it is not a one-person lift up a set of stairs. Unbox it where it is going to live, or bring a friend.
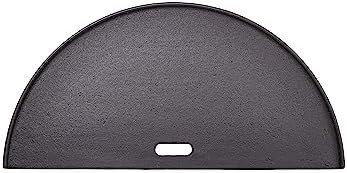
The searing surface: Kamado Joe Half-Moon Cast Iron Reversible Flat-Top Griddle
 Visit on Amazon →
This is a half-moon cast iron griddle made for Classic Joe kamados and similar 18-inch cookers, and it is reversible: smooth on one side, ribbed on the other. The half-moon shape is the whole point. It drops into half the grate, which leaves you the other half open for direct or indirect cooking. That means you can run a pork butt at 250 on the open side and finish vegetables on the flat top at the same time, or run the reverse sear I describe below without moving the meat to a different cooker.
Smooth side for smash burgers, eggs, bacon, and a steak crust. Ribbed side for grill marks and for letting fat run off a sausage or a chicken thigh. Cast iron is not fussy, but it is honest: season it, keep it dry, and oil the surface after every cook. In Savannah humidity, a bare cast iron pan left outside overnight will show rust by morning.
Who it suits: anyone who wants flat-top cooking on a kamado without giving up half their grate space, and anyone who wants a hard sear on a steak without opening the lid and losing all their heat.
Flaws but not dealbreakers: Cast iron takes ten minutes to come up to searing temperature on a cold cooker. Put it in at the start of the heat soak, not at the end.
The setup, step by step
Step one: Inspect the ceramic before you assemble anything. Look at the firebox, the fire ring, and the inside of the dome. You are looking for cracks, chips on the rim, and whether the firebox sits level. If it rocks, do not cook on it. Call the seller with photos before you light a fire, because a firebox that is cracked on arrival is a warranty conversation, not a seasoning problem.
Step two: Check the seal. Close the lid and look at the gap between the top and bottom halves all the way around. It should be even. The old trick is to close the lid on a dollar bill at four points around the rim and pull. If the bill slides out with no drag at one spot, that spot is leaking, and a leaking lid is the number one cause of a kamado that will not hold temperature.
Step three: Set it where it lives. Level ground, non-combustible surface, and clearance from siding, fences, and anything vinyl. Kamados get hot underneath and they hold heat for hours after you shut them down. A cooker that has to be moved after every use is a cooker that gets used twice a month.
Step four: The burn-in. Load lump charcoal, light the top of the pile, and bring the dome to 250 to 300 degrees with nothing on the grate. Let it run 60 to 90 minutes. This cures the gasket, burns off manufacturing oils, and gives you your first look at how the vents behave. Do not take a brand new kamado to 600 degrees on day one. You are seasoning a seal, not proving a point.
Step five: Learn the vents before you cook anything expensive. The bottom vent is the throttle, and the top vent is the fine trim. Open the bottom a finger's width and the top about half, then wait. Small changes, ten to fifteen minutes apart. The single biggest mistake new kamado owners make is chasing the temperature every three minutes. Ceramic has mass. It responds slowly, and if you keep fiddling you will overshoot, then undershoot, then spend an hour trying to land back on 250.
Step six: Heat soak. Once the dome reads your target, wait another 30 to 45 minutes before the meat goes on. This is the step that gets skipped and it is the step that ruins briskets. The dome thermometer can read 250 while the ceramic walls are still cold and the grate is sitting at 190. Heat soak until the temperature has been stable for half an hour with the vents untouched. Then you know the cooker is actually at temperature, not just passing through it.
Step seven: Cook something forgiving first. A spatchcocked chicken at 350, or a pork butt at 250. Not a $90 brisket. You want two or three cooks of practice on vent control before you trust yourself with a piece of meat that costs more than a tank of gas.
Step eight: Shut it down and save the charcoal. Close the bottom vent all the way, then the top. The fire snuffs out and the leftover lump is reusable next time. Never leave the top vent wide open after a cook, and never douse a kamado with water.
Searing and finishing on the griddle
Once you can hold 250 for six hours, the next skill is a hard sear. Here is the reverse sear I run on a thick ribeye or a tri-tip.
Cook the steak indirect at 250 until it is about 15 degrees below your target. Pull it, tent it, and open both vents wide. Give the cooker ten to fifteen minutes to climb. The griddle goes in at the start of that climb so the cast iron is genuinely hot when the meat hits it, not just warm. Two minutes a side on the smooth surface, rotating a quarter turn at the halfway mark if you want crosshatch marks, and you have a crust that a 250-degree cook will never give you.
The half-moon shape earns its keep here. Half the grate stays open for the meat to rest over indirect heat while the other half is a flat top for onions, peppers, or a smash burger. On a kamado with a full round grate, you are either searing or cooking indirect. With the griddle dropped in, you are doing both.
Clean it while it is still warm. Scrape the flat side, wipe it with a paper towel, and put a thin coat of oil on it before it cools all the way. Cast iron that gets put away dirty is cast iron you will be scrubbing with steel wool in a month.
The temperature numbers that matter
Low and slow is 225 to 250 at the dome. Poultry and most baking runs 350 to 400. A steak sear wants 500 and up, which is where a kamado leaves every other charcoal grill behind, because the ceramic will hold that heat instead of dumping it the second you open the lid.
The number to watch is not the dome. It is the grate. Clip a probe at grate level, near the meat but not touching it, and trust that reading. On a long cook, a 15-degree difference between the dome and the grate is normal. A 40-degree difference means something is wrong with your airflow or your seal.
Mistakes that ruin a new kamado
Buying thin ceramic. If the walls look like a flowerpot, walk away. Thin ceramic cannot hold temperature, and no vent technique will fix it.
Skipping the heat soak. Covered above, and it is the most common reason a first brisket comes out dry.
Chasing temperature every five minutes. Make a change, wait ten minutes, then decide.
Letting ash build up in the bottom. Ash chokes the bottom vent and you will spend a cook wondering why the fire will not climb. Empty the ash before every long cook.
Cooking with lighter fluid. Never. A chimney or a wax cube, always.
Splashing cold water or rain on a hot dome. Thermal shock cracks ceramic. If a storm rolls in, close the vents and let it ride.
What this costs over the long run
A kamado is a lifetime purchase. Buy the one you will actually use on a Tuesday, not the one that looks best in a photo with six friends standing around it. Check current Amazon price on both the cooker and the griddle before you commit, and do the math the honest way: divide the cost by ten years, not by one summer.
The cooker is the one-time expense. The griddle is the small add-on that turns it into a two-zone cooking machine. The recurring cost is charcoal, and a kamado uses less of it than any other grill you will own, because you snuff the fire and reuse the lump.
That is the whole setup. Inspect the ceramic, seat the seal, learn the vents, heat soak until the dome stops moving, and cook something cheap before you cook something expensive. Do that and the grill will do its job, which is holding temperature through whatever Savannah throws at it.