Most people buy a ceramic kamado, fill the firebox to the top, light it, and then spend the next two hours chasing the temperature with both vents cranked open. That is not a grill problem. It is a setup problem. A ceramic kamado grill setup done right is boring: you build a small fire, you let the ceramic heat soak until the dome stops climbing, and then you make tiny vent adjustments and walk away.
I have cooked competition barbecue for 18 years out of Savannah, Georgia, and I run two briskets a week in a backyard test kitchen, year round. I have owned and cooked on six kamados in the last three years, and I have watched a $90 brisket turn into charcoal on a cooker that was perfectly capable of holding 250 degrees if the cook had just waited 40 minutes before putting meat on the grate.
This is the setup routine I run on every ceramic cooker that comes through my yard. It covers the assembly check, the first light, the heat soak, overnight vent discipline, and the shutdown that saves you a firebox full of charcoal for the next cook.
Why you should trust me
I have been cooking competition barbecue for 18 years. My test kitchen in Savannah runs two briskets a week, every week, all year, which means every cooker I write about has to survive a Georgia summer thunderstorm and a January cold snap inside the same twelve months.
The rule I hold myself to is simple: no opinion without a temperature log. Every kamado that comes through here gets a low-and-slow cook, a hot sear with the vents wide open, and a full run of brisket cooks before I say anything about it in print. I keep a digital thermometer collection that looks like a bomb squad tool kit, and I actually use it.
I do not care how shiny the lid is. A kamado's whole job is holding temperature. Everything else is marketing.
How I picked and how I tested
The gear below is not a list of every kamado on the market. It is the cooker this guide is built around and the one grid that solves a specific problem for people who also keep a gas grill in the yard. Two different jobs, two different tools.
When a ceramic cooker shows up, I look at five things before I even light it. First, ceramic thickness at the dome and the firebox. Thin ceramic is why cheap cookers swing 75 degrees when a cloud rolls in. Second, the gasket. A felt gasket that peels in one season takes your temperature control with it, because a leaking lid means oxygen you cannot regulate. Third, the firebox. It will crack eventually, on every kamado ever made, and the only question that matters is whether the warranty replaces it without a fight. Fourth, the vent design, because a top vent that will not hold a setting is a cooker that will not hold a temperature. Fifth, the hinge and band, since a dome that does not seat square is a dome that leaks.
For the cook testing, I run a 12 hour hold at 250, a hot sear, and a full storm season. I log dome temperature every 15 minutes. I do not publish a verdict on a cooker until I have the logs, so where I am working from the spec sheet instead of a brisket cook, I will tell you that straight.
The one number that matters most: the difference between your target temperature and your dome temperature. If that gap is 25 degrees or less after the heat soak, you are cooking. If it is swinging 50, you have an air leak or you built too big a fire.
The cooker and the grid on the bench
Two pieces of gear come up in almost every conversation I have about kamado setup: the ceramic cooker itself, and whatever you are cooking on beside it.
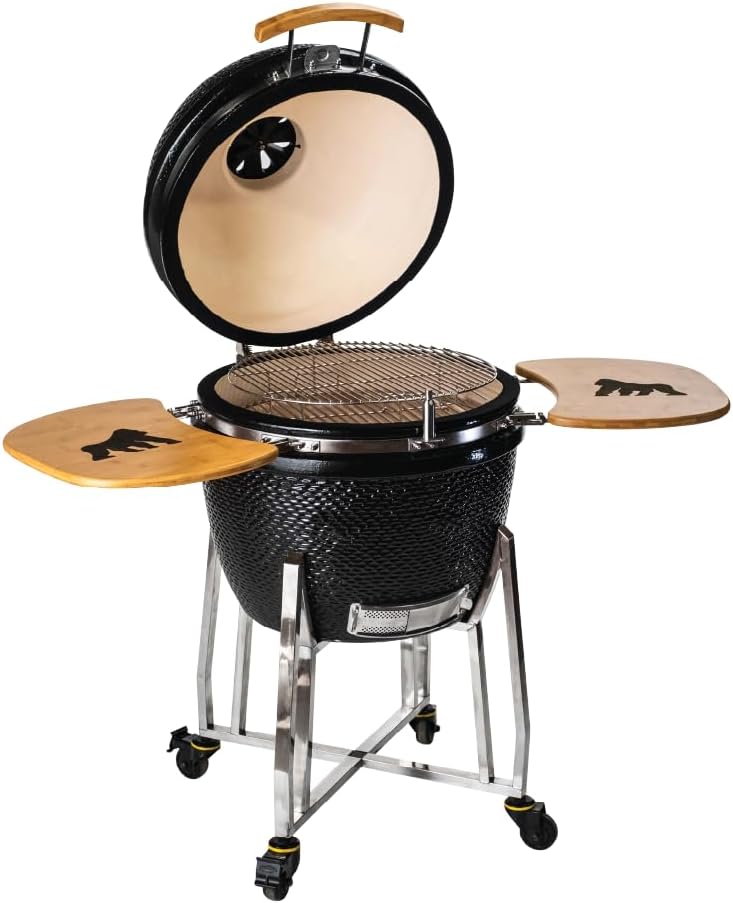
Our pick: GRILLA Kong Ceramic Kamado Grill with Adjustable Vent, Ceramic Construction, 600 Square Inches of Cook Space for Outdoor Cooking, Grilling, Outdoor Grilling
 Visit on Amazon →
This is the cooker I would build a setup routine around: ceramic construction, an adjustable top vent, and 600 square inches of cook space. That last number is the one to think hardest about. Six hundred square inches is a lot of grate, which is great news for a packer brisket plus two pork butts, and bad news if you are cooking for two on a Tuesday and heating a small ceramic cathedral every time you want a burger.
The adjustable vent is the feature that actually decides whether you will like this grill. Vent control is 90 percent of kamado cooking. A top vent that holds its setting lets you dial in 250 and leave it. A top vent that drifts turns an overnight cook into an all-nighter where you are standing on the patio at 3 a.m. in your bathrobe.
What I would check on day one: that the dome seats square against the gasket, that the band hardware is tight, and that the firebox is sitting level in the base with no wobble. Then I would run a dry cook with no food at all, just to watch where the temperature settles and how long the ceramic takes to stabilize. Learn the cooker empty before you trust it with a brisket.
Flaws but not dealbreakers: Ceramic this size is heavy, so plan on two people and a level surface for assembly. And every kamado ships with a gasket that will eventually need replacing, so treat that seal as a wear item, not a permanent part.
Anyone feeding a crowd or cooking packer briskets and butts should start here. If you cook for two and want a fast weeknight burger, a smaller ceramic will serve you better.
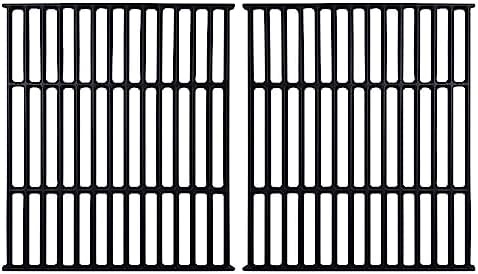
For the gas grill beside it: 9865-54 Grill Grates Replacement Parts for Broil King Grill Parts 9453-54 signet 20 70 90 320 986974 Broil-Mate 165154 6666-64 1551-54 1651-54 Huntington 6962-64C Cast Iron Cooking Grids 2 Pieces
 Visit on Amazon →
Here is the honest caveat up front: this is a two piece cast iron cooking grid set made as a replacement part for the Broil King and Broil-Mate models listed in the product name. It is not a kamado grate, and it will not fit your ceramic cooker. Do not buy it for the egg.
Buy it for the gas grill sitting next to the egg. Most people who get serious about a kamado still keep a gasser for weeknight hot dogs and a fast sear, and the stamped steel or thin wire grids that ship on those grills are the weakest part of the whole machine. Cast iron holds heat differently. It gives you a hard sear and real grill marks instead of the pale stripes you get off thin steel.
Because it is bare cast iron, it needs seasoning and it needs to come inside when the weather turns. Oil it after every cook, keep it dry, and it will outlast the grill it sits on. Leave it out in Savannah humidity for a month and you will be scrubbing rust, which is a waste of a good grid.
Flaws but not dealbreakers: Two pieces means a seam down the middle of the cook surface, and bare cast iron is heavy. That weight is the point, but it does mean you will not be flipping it one handed.
Anyone with one of the listed Broil King or Broil-Mate grills whose original grids have rusted through should grab this. Anyone shopping for kamado accessories should keep scrolling.
The setup workflow, step by step
Now the part you came for. This works on any ceramic kamado with a top and bottom vent.
Step one: Assemble and check the seal. Set the cooker on a level, non combustible surface with clearance on all sides. Tighten the band hardware. Close the dome and look for daylight around the gasket. If you can see light, you have an air leak before you have even built a fire.
Step two: Load the charcoal right. Fill the firebox with lump charcoal, not briquettes. Leave the biggest pieces at the bottom where they will feed the fire longest, and do not pack it up into the dome. A kamado does not need a mountain of fuel. It needs airflow through a bed of good lump.
Step three: Light from the top. Light the top center of the pile, not the bottom edges. A top-down fire burns clean and slow, which is exactly what a low-and-slow cook needs. Close the dome with both vents open wide and let it climb.
Step four: Catch it on the way up, not on the way down. This is the mistake that ruins briskets. A kamado overshoots easily and takes forever to come back down. Start closing the vents when you are 50 degrees below your target. If you want 250, start shutting down at 200.
Step five: Set the bottom vent coarse, the top vent fine. The bottom vent feeds the fire, so a small change there swings the dome hard. Set the bottom first, then fine tune with the top. Once you are within 25 degrees of target, stop touching the bottom vent entirely.
Step six: Heat soak for 30 to 45 minutes. Ceramic is a heat battery. The dome temperature will read 250 long before the walls are actually at 250, and if you put meat on during that gap, the cold meat pulls the dome down and you spend the next hour chasing it. Wait until the temperature has held steady for 15 minutes with no adjustment.
Step seven: Add the deflector, then the grate, then the meat. Heat deflector first, grate on top, close the dome, and give it 10 minutes to recover before the meat goes on. Cold meat drops your dome temperature no matter what you do, so expect a dip and do not panic correct it with the vents.
Step eight: Hold the line overnight. For a long cook, aim for a full firebox, a small top vent opening, and a bottom vent barely cracked. Check it before bed, then check it once in the middle of the night. No kamado is set and forget, and anyone who tells you otherwise has never cooked through a thunderstorm.
Step nine: Shut it down and save the fuel. Close both vents completely when you are done. The fire dies from lack of oxygen, and whatever lump is left will be reusable next cook. Shake out the ash only when the cooker is cold. Ash in the bottom blocks airflow, and blocked airflow is the root of most temperature problems people blame on the grill.
The competition and why it lost
The thin walled hardware store kamado is the one to avoid. It looks like the real thing, and the price looks like a steal, but the ceramic is thin, the gasket fails in a season, and the firebox cracks on the first cold snap. You will spend more on replacement parts in two years than you saved.
The steel bodied kamado is a different animal. You lose some insulation and some of that steady overnight hold, but you also lose the cracking problem entirely, because there is no ceramic shell to crack. That is a fair trade for some cooks and a deal breaker for others.
The giant 27 inch ceramic is a commitment, not a grill. It weighs what a small motorcycle weighs, it eats fuel, and it takes longer to heat soak. Buy it because you cook for crowds, not because you might someday.
And the cast iron grid set above belongs to a different conversation entirely. It is a gas grill part. Putting a gas grill part on a kamado list is how people end up with a box of parts that do not fit anything they own.
What this all costs
I am not going to quote prices here, because they move and I would rather you check the current Amazon price at the links above than trust a number I typed last week. What I will tell you is how to think about the money.
A ceramic kamado is a lifetime purchase. Spread over ten years of weekly cooks, even a serious cooker works out to a few dollars a cook, which is less than one drive through burger. The number that actually matters is cost per cook, not cost at checkout.
The cast iron grid is a small upgrade that fixes the worst part of a gas grill you already own, which is a much better use of money than replacing a working grill.
The real cost of kamado cooking is not gear. It is the 40 minutes of heat soak you have to sit through before the meat goes on. That time is free, and it is the difference between a cooker that holds 250 all night and a cooker you sell on Marketplace in three months.
That is the job. Build a small fire, wait for the ceramic, and let the vents do the work.