Most people who buy a small kamado never get a good cook out of it, and it is almost never the cooker's fault. It is the setup. A portable kamado grill setup is a sequence, and the sequence matters: check the seal, season the grates, load the lump correctly, then let the thing heat soak before anything touches the grate. Skip that last part and you will spend the afternoon chasing temperature with the vents instead of cooking.
I have been cooking competition barbecue out of Savannah for 18 years. I run a backyard test kitchen where two briskets go on every week, year round, and I have spent three years and six kamados figuring out which ones hold 250 degrees through a Georgia thunderstorm and which ones turn a $90 packer into charcoal. The steps below are the same whether you are setting up a 155 square inch portable or a 400 pound ceramic that lives on a rolling nest.
A kamado's whole job is holding temperature. Everything else, the paint color, the brand name, the photos on the box, is marketing. Get the setup right and a small cooker will run for hours on a couple pounds of lump. Get it wrong and you will blame the grill for a problem you built yourself.
Why you should trust me
I have cooked on everything from a rusty offset to a $4,000 ceramic egg, and I have burned more briskets than most people will ever cook, all in the name of finding out where the temperature actually goes when the weather turns. I keep a digital thermometer collection that looks like a bomb squad's tool kit, and every cook gets logged. Nothing gets recommended on this site until it has survived 12 brisket cooks and a full storm season.
I also watched a neighbor buy a cheap kamado, burn two briskets on it, and sell it for half what he paid. That is why the setup steps below are as long as they are. Most of the failures I see in person are setup failures, not equipment failures, and the difference between a cooker that gets used every week and one that gets sold in a season is usually 45 minutes of patience on the front end.
How I picked and how I tested
This is not a shootout between kamados. It is a how-to about the two pieces of gear that decide whether a setup works: the cooker itself, and, if your cooker is a large ceramic, the thing it sits on.
I pick gear the boring way. Material first. Then the lid seal and the hardware, because a gasket that peels in one season turns a good cooker into a bad one. Then the warranty, specifically whether it covers the firebox without a fight. Then price. Those are the four questions I ask about any kamado, and they come straight out of what actually goes wrong in a backyard over five years.
The numbers I trust when I am working: a dome thermometer is not a grate thermometer, and the two can disagree enough to ruin a cook. A kamado at a stable 250 with the vents settled is the baseline for low and slow. The first 30 to 45 minutes are heat soak, not cooking time. If you are cooking through weather, you check the cooker more, not less.
The two products below are the ones I would start with for a small patio setup and for moving a large ceramic. Both are honest about what they are, which is more than I can say for a lot of what gets sold as kamado gear.
The gear this setup calls for
For a small setup you need a cooker you can pick up and carry, because a portable kamado that takes two people to move is not portable. If you already own a large ceramic, you need a way to move it that does not involve dragging 300 pounds across a patio, which is how fireboxes die.
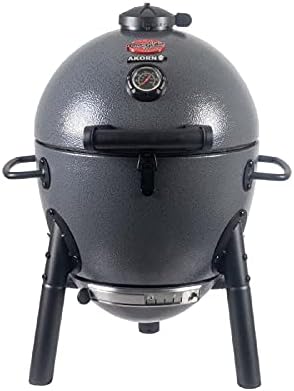
Small-cooker pick: Char-Griller® AKORN® Jr. Portable Kamado Charcoal Grill and Smoker with Cast Iron Grates and Locking Lid with 155 Cooking Square Inches in Ash, Model E86714
 Visit on Amazon →
Check current Amazon price. The case for this one is simple: it is a kamado you can carry, and the features that matter on a small cooker are all here. Cast iron grates hold heat and give you a real sear instead of a gray steak. A locking lid matters when the cooker lives in a truck bed or gets wheeled to a tailgate. And the ash finish will look better after two years of cooks than a shiny one will.
Read the spec honestly, because the spec tells you the truth. This is a small kamado with 155 cooking square inches, which is a single-zone cooker: one spatchcocked chicken, two ribeyes, a rack of ribs cut in half, or a pork butt for a small crowd. It is not a packer brisket cooker, and anyone who tells you otherwise has not tried to fit a 12 pound brisket on 155 square inches without bending it. Bending it is how you get a dry flat.
For cooking for two to four people on a patio, that size is the point. It comes up to temperature quickly, it is easy to store, and it is not a production to move. Check the lid alignment and the gasket as soon as it arrives, before the first cook, and you will save yourself a season of vent fighting.
Flaws but not dealbreakers: Small cookers swing faster than large ceramics. A quarter inch of vent movement that a big egg shrugs off will move a small kamado 50 degrees. Expect to check it more often on a long cook and to learn vent control sooner, and check the dimensions against your cooking plans before you order.
Anyone cooking for one to four people, in an apartment patio, a small yard, or the back of a truck, will get the most out of this size.
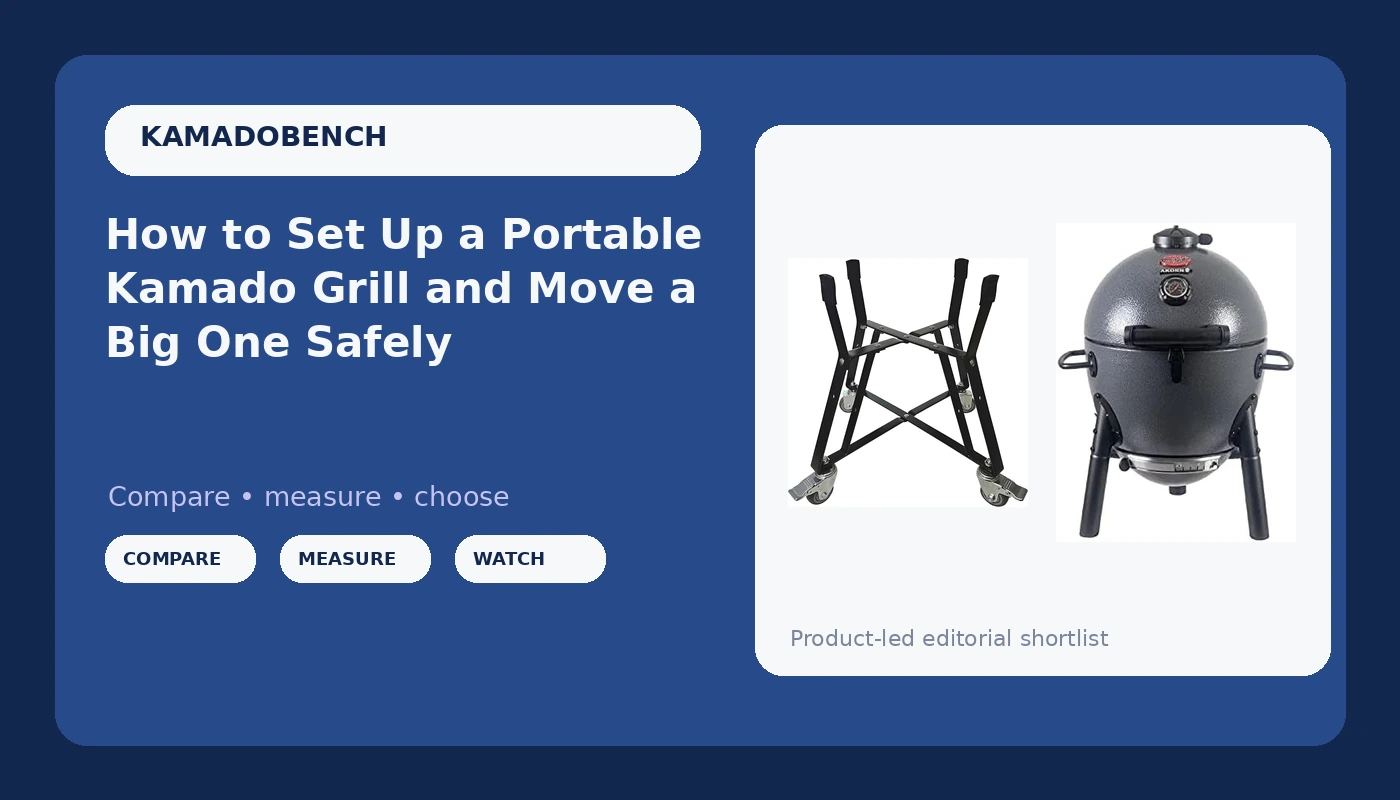
Mobility pick for large kamados: Rolling Cart Rolling Nest for Large Kamado Grills, Big Green Egg Accessories Powder Coated Best Casters
 Visit on Amazon →
Check current Amazon price. If you own a large ceramic, a rolling nest is not an accessory. It is insurance. Powder coated steel resists the rust that eats cheap carts on a humid Savannah patio, and casters let you roll the cooker into the garage before a storm instead of standing there hoping the band hardware holds.
The honest caveat: this is sized for large kamado grills, the Big Green Egg class. It is not sized for a small portable cooker. The Jr. above gets carried by its handle, not rolled. Measure your cooker and check the fit before you order, because a rolling nest that is too big for your ceramic is just a very expensive dolly.
Flaws but not dealbreakers: Casters are the weak point on any outdoor cart. They do not love gravel, thick grass, or a patio with a real slope, and a locking caster is only as good as the surface under it. Do not roll a loaded ceramic over a step or a threshold, and latch the lid before you move it, every time.
Anyone with a large ceramic kamado that has been sitting in the same spot for years because moving it felt dangerous will find this solves the real problem.
The setup, step by step
Now the part that matters. This works on any kamado, big or small, and it takes about an hour before the meat ever comes out of the fridge.
Step one: Inspect the seal before the first cook. Close the lid on a dollar bill and pull. If the bill slides out with no resistance, the lid is not sealing, and a lid that does not seal is a temperature control problem you cannot fix with vents. Check all the way around. On a new cooker, check the lid alignment and the latch, then check it again after the first hot cook, because hardware settles.
Step two: Season the cast iron grates. Cast iron ships with a factory coating you do not want on your food. Wipe the grates with a high smoke point oil, run the cooker at 350 to 400 degrees for 30 to 40 minutes, then let it cool. Do this before the first steak, not after.
Step three: Fill the firebox with lump, not briquettes. Briquettes ash heavily and clog airflow, which is fatal on a small cooker. Big pieces on the bottom so air can move, smaller pieces on top, and fill to just below the top of the firebox. If you overfill it, you will smother the fire and wonder why the temperature will not climb.
Step four: Light it in one spot. One starter cube or a small chimney of lit lump in the center. Leave the lid open until the top layer catches, then close it, bottom vent wide open and top vent open. Resist the urge to light the whole bed of charcoal. You want a small, controlled fire, not a bonfire.
Step five: Heat soak for 30 to 45 minutes. This is the step everybody skips. Bring the dome to your target, then wait until it has held that number for 20 minutes without you touching a vent. On a small cooker, add 10 minutes, because the temperature climbs fast and settles slow. Stable before meat. Always.
Step six: Trust a grate probe, not the dome. Dome thermometers read the air at the top of the lid, which runs hotter than the surface your food is sitting on. Clip a digital probe at grate level and cook to that number. This one habit fixes more bad cooks than any upgrade you can buy.
Step seven: Tune with the bottom vent first, top vent second. The bottom vent is your throttle. The top vent is your fine trim. Make changes a quarter inch at a time and wait 10 minutes before you judge them. Come up to temperature from below, because a kamado that overshoots takes forever to come back down. If you do overshoot, close the bottom vent most of the way and wait. Do not open the lid to cool it down, that just feeds the fire.
Step eight: Set your zones. On 155 square inches you have one zone, so use it well. Cook direct over the lit coals for steaks and chops, and add a heat deflector for indirect work like whole chickens and pork butt. When the cook is done, close both vents all the way and let the fire snuff out. Next time, stir the old lump, add fresh on top, and relight. Never dump hot ash into a trash can, and never move a large kamado while it is still hot.
What goes wrong
Gaskets peel. It is the single most common kamado failure I see, and it happens in a season on cheap units. When the seal goes, you lose temperature control, you chase vents, and you blame the fuel. Check the gasket every few months and replace it before it fails mid cook.
Fireboxes crack, usually on the first cold snap after a hot summer. The question is never whether it happens, it is whether the warranty replaces it without a fight. Read the firebox language before you buy, keep your receipt, and take photos the day you unbox.
Cheap "kamado style" grills from the hardware store are a special kind of trap. The ceramic is thin, the gaskets fail, the firebox cracks in a season, and the warranty wants a notarized confession. The handles advertised as heat resistant will still burn your hand. Skip that tier and buy something you can actually cook on.
And if you own a large ceramic, stop dragging it. A rolling nest and a latched lid cost far less than a cracked firebox and a shipping bill.
What this all costs
The setup here is two purchases at most. A small cooker for the patio and tailgate cooks, and a rolling nest if you already own a large ceramic that needs to move. Check current Amazon price on each before you commit, and measure your existing cooker against the nest dimensions rather than guessing.
The ongoing cost is lump charcoal, and a kamado is frugal with it because you snuff the fire and reuse what is left. Run the math over five years and the per-cook cost gets small fast. The purchase decision is not the interesting one, though. The interesting one is size. A 13-inch kamado is a toy and a 27-inch is a commitment, and a cooker that is a hassle to set up is a cooker that does not get used on a Tuesday.
Buy the size you will actually fire up on a weeknight. Learn the vents before you buy a temperature controller, and treat the controller as a tool for overnight cooks rather than a fix for a setup you never learned. Season the grates, load the lump right, heat soak the dome, and cook to a grate probe.
That is the job. Your kamado was built to hold temperature. Let it.