Most people buy a small kamado grill, cook two ribeyes on it, and then park it under a cover next to the shed for a year. That is a waste of good ceramic. A 13-inch egg is a real cooker. It will hold 250 degrees for a long cook, it will put a crust on a steak, and it will run on a fraction of the charcoal a full-size kamado swallows.
I have been cooking competition barbecue for 18 years, and I have spent the last three of them buying, running, and occasionally cussing at kamados of every size. The small ones are what people ask me about most, usually right after they have bought one and figured out that the vents do not behave the way the manual claims.
Here is how to set up a small kamado grill, light it, hold temperature on it, and shut it down without burning half a bag of lump every time.
Why you should trust me
I have cooked on everything from a rusted-out offset I bought used to a $4,000 ceramic egg that belongs to a man with better insurance than me. I cook two briskets a week, every week, year-round, out of a backyard test kitchen in Savannah. That is a lot of fire management, and it teaches you fast which cookers hold temperature through a Georgia thunderstorm and which ones turn a $90 brisket into a charcoal briquette.
Small kamados get the same treatment. I do not care what the box says. I care whether the dome holds, whether the gasket survives a season, and whether the firebox cracks the first time the temperature drops 30 degrees overnight.
How I picked and how I tested
The checklist is short and unforgiving. Ceramic thickness first, because that is the entire point of a kamado. Gasket quality second, because a kamado with a bad seal is just an expensive charcoal chimney. Firebox design third, because that ceramic bowl cracks eventually and I want to know whether the company replaces it without a fight. Vent fit fourth, because a bottom vent that slops around will never hold a low and slow setting.
Then I run the cooker the way I run every ceramic that comes through the yard: light a small chimney, let the dome come up slowly, hold a low setting for hours, then open it up for a sear and watch how it responds. Small ceramics react faster than big ones in both directions, and that is the part most beginners are not ready for. A 24-inch egg forgives a lazy vent adjustment. A 13-inch kamado does not.
The second product in this guide is a different animal entirely, and I will explain why it is here when we get to it.
What a small kamado can and cannot do
Let me save you some money and some disappointment.
A 13-inch kamado will cook two racks of ribs on a rib rack, a spatchcocked chicken with room to spare, a pork butt, a couple of steaks, or vegetables for a family of four. It will hold 250 degrees for hours on a small load of lump charcoal, and it will get hot enough to put a crust on a steak that no gas grill can match.
It will not cook a full packer brisket. You can fit a trimmed flat, but a 14-pound packer is not happening. It will not feed a crowd. And it does not have the thermal mass of a 24-inch egg, which means a cold wind will move your temperature more than it would on a big ceramic. Small kamado means small margin for error.
That is not a knock on the format. It is the trade you make for a cooker that heats up in half the time, burns half the fuel, and fits on a balcony.
The cooker
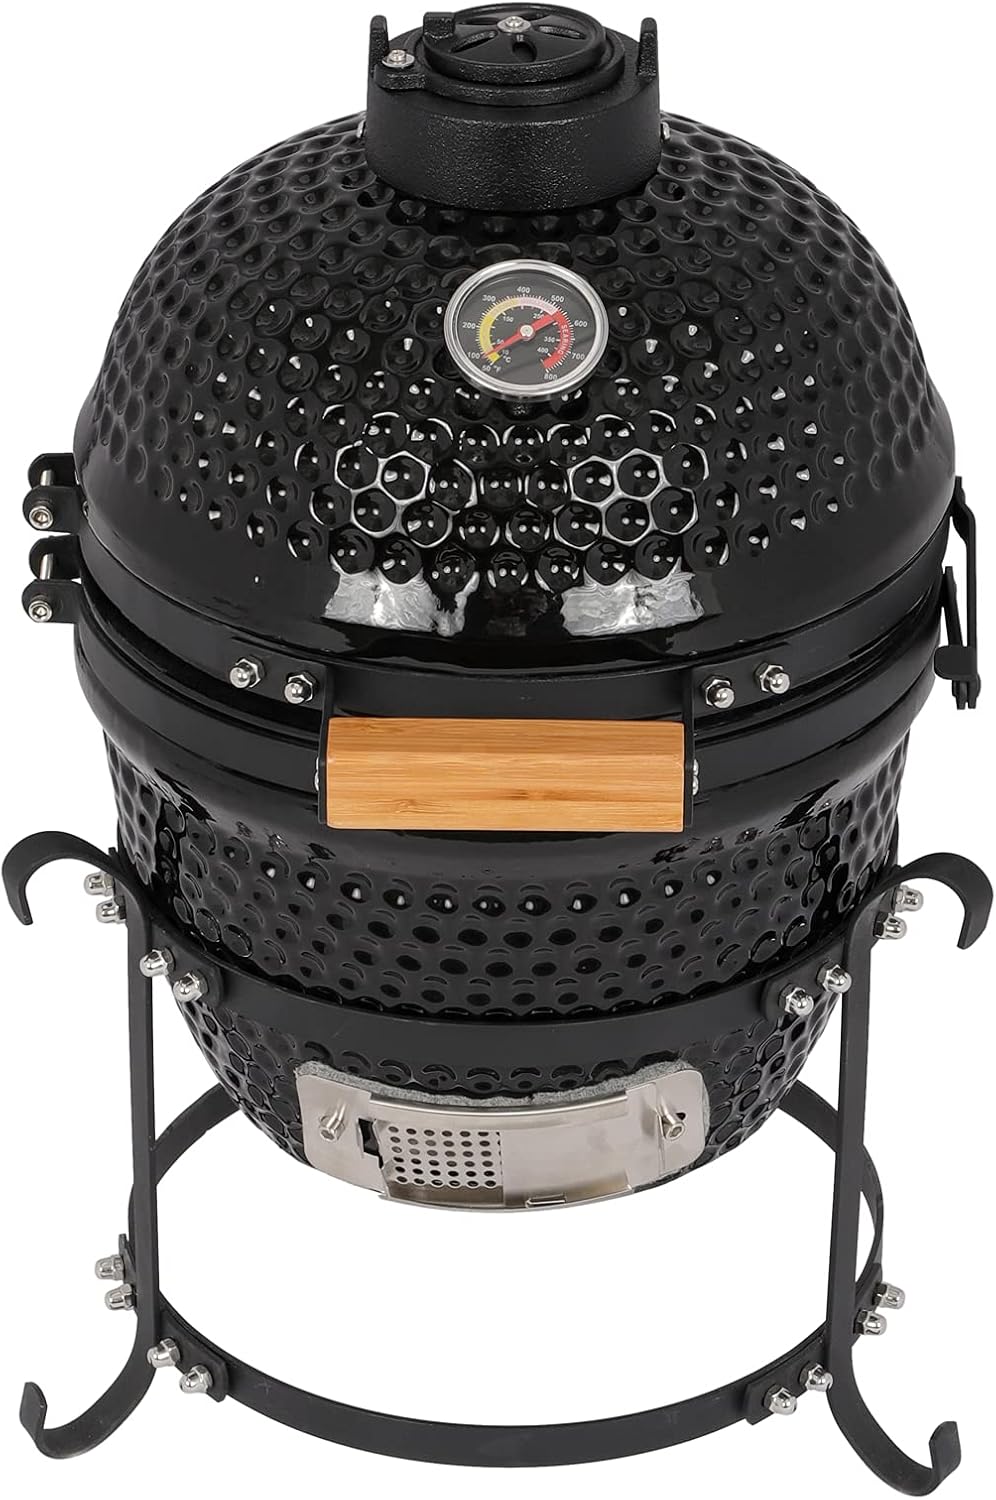
Our pick: 13" Round Ceramic Kamado Charcoal Grill - Heavy-Duty Black Outdoor BBQ Smoker with Heat Retention, Portable Egg Design for Grilling, Smoking, Baking & Roasting (Includes Ash Tool)
 Visit on Amazon →
This is the small ceramic I would hand a beginner. The dome has real weight to it, which is what you want, because weight in the lid means heat stays in the cooker instead of leaking out the top. The shape is the classic egg profile, so the airflow path is the same one kamado cooks have used for decades. Top vent, bottom vent, firebox in the middle, and a gasket sealing the two halves.
The ash tool that comes in the box matters more than it sounds. Small kamados have small fireboxes, and ash is what kills airflow on a long cook. Scrape the firebox out before every session and you will hold temperature far more consistently than the guy who cleans his once a month.
Flaws but not dealbreakers: It is small. The grate is roughly the footprint of a dinner plate plus a few inches, so plan your cooks around that instead of fighting it. And like most ceramics at this size, it does not ship with a heat deflector, so if you want to cook indirect you will be buying one or improvising one.
Anyone cooking for two to four people, or anyone who wants a second cooker for sides and searing while the big one runs, will get their money out of this one.
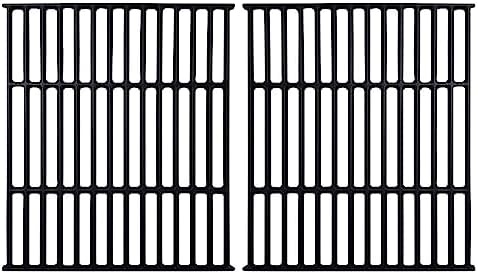
The yard-mate: 9865-54 Grill Grates Replacement Parts for Broil King Grill Parts 9453-54 signet 20 70 90 320 986974 Broil-Mate 165154 6666-64 1551-54 1651-54 Huntington 6962-64C Cast Iron Cooking Grids 2 Pieces
 Visit on Amazon →
I am including this because most people who own a kamado also own a gas grill, and most gas grills are still running the stamped steel or porcelain-coated grids they shipped with. These are cast iron cooking grids, two pieces, sold as replacement parts for a list of Broil King, Broil-Mate, and Huntington models, including the Signet line and several numbered models named in the listing.
Cast iron changes how a gas grill cooks. It holds heat, it puts real marks on a steak, and it gets better every time you use it, as long as you keep it oiled and keep it dry. The catch with any replacement grate is fitment. This is a model-specific part, so match the model number on your grill against the list in the listing before you order, and measure the old grids if you are not certain. A cast iron grid that sits crooked over the burners is worse than the one you were replacing.
Flaws but not dealbreakers: Cast iron is heavy and it will rust if you leave it out in the rain. Season it like a skillet, wipe it down after every cook, and it will outlast the grill it sits in.
Anyone with a Broil King or Broil-Mate on that model list who is tired of replacing cheap grids every other season should look here.
Step-by-step: lighting a small kamado
Step one: Clean out the ash. Every cook. Pull the ash tool through the firebox, knock the holes clear, and dump the ash pan if yours has one. Airflow is temperature control, and ash is the enemy of airflow.
Step two: Load the charcoal. Fill the firebox to the top for a long cook. For a quick sear, a single layer of lump is plenty. Do not pack it tight. You want gaps for air to move through.
Step three: Light it in one spot. A chimney starter, a fire starter cube, or a propane torch all work. Light one spot near the middle and leave the rest of the bed alone. If you light the whole bed, you will spend the next hour trying to bring the temperature down, and a kamado does not cool fast.
Step four: Set the vents before the dome is hot. Bottom vent cracked open, top vent open a couple of turns, then close the lid. A kamado heats with the lid down, not up. Every minute you stand there with the lid open is a minute you are feeding the fire oxygen.
Step five: Heat soak. This is the step everybody skips and then blames the cooker for. When the dome thermometer hits your target, wait 30 to 45 minutes. The ceramic has to come up to temperature, not just the air inside it. If you put meat on the second the needle hits 250, the temperature will drop when the cold meat goes in, the fire will surge to compensate, and you will spend the first hour of the cook chasing the needle. Let it soak, then adjust.
Step six: Dial it in with the bottom vent. Make small adjustments, then wait 15 minutes before you touch anything again. The bottom vent is your throttle. The top vent is your fine trim. Chasing the needle every two minutes is how people ruin cooks.
Vent settings that actually work
- Low and slow, 225 to 275 degrees: Bottom vent barely cracked, top vent open a sliver. This is a small fire breathing through a small hole, and it is where a kamado earns its reputation.
- Medium, 300 to 375 degrees: Bottom vent open a finger width, top vent about half open. Good for chicken, ribs at the end of a cook, and anything you want to move a little faster.
- Hot, 400 to 500 degrees: Bottom vent half open, top vent wide. Pizza, vegetables, a reverse sear finish.
- Sear, 550 and up: Both vents wide open and give it time. Do not be surprised if this takes 20 minutes from a cold start on a small ceramic.
One more thing about small kamados: they lose heat faster than big ones, so your vent settings will run a touch more open than a 24-inch egg would need for the same temperature. That is normal. Do not fight it.
Shutting it down
When you are done, close the top vent and the bottom vent all the way. Do not open the lid. The fire will starve itself out in 20 to 30 minutes, and whatever lump is left over will be reusable on the next cook. Shake the ash off the leftover lump before you reload.
Never spray water into a hot kamado. Never dump hot coals into a plastic bucket. And do not leave the vents open overnight thinking the fire will burn itself out, because it will not.
Maintenance: the parts that fail
Gaskets fail. That is the first thing to go on a ceramic cooker, and when the seal goes, your temperature control goes with it. If you see the felt peeling away from the rim or the lid, replace it before your next long cook. A gasket kit costs less than one brisket.
Fireboxes crack. It happens to every kamado eventually, usually on the first hard cold snap after a hot cook. The question is whether the manufacturer replaces it without a fight, so read the warranty before you buy, not after.
Grates rust. Keep them oiled. Cast iron and ceramic-coated steel both need a coat of oil after you clean them, and neither one likes sitting outside in Savannah humidity.
What this all costs
The math on a small kamado is simple. It costs less than a full-size ceramic, it burns less fuel per cook, and it heats up faster, which means you will actually fire it on a Tuesday instead of saving it for the weekend. The ash tool comes in the box. A heat deflector is the one accessory I would buy first.
Replacement grates are the cheapest upgrade in your yard if you are still cooking on worn-out factory grids, and the only cost that matters there is getting the fitment right the first time.
The expensive part is not the cooker. It is the learning curve, and that curve is shorter than you think. Learn the vents, respect the heat soak, and a 13-inch kamado will out-cook grills that cost three times as much.
The bottom line
A small kamado is not a toy and it is not a compromise. It is a cooker that rewards attention and punishes impatience, which is true of every kamado ever made. Get the fire lit in one spot, let the ceramic soak, and keep your adjustments small and slow.
Do that and you will stop fighting the cooker and start cooking on it.