Most people who buy a small kamado grill cook two steaks on it, fight the temperature for a month, and then park it in the garage next to the mower. That is not a grill problem. It is a vent problem. A 13-inch ceramic holds less thermal mass than a full-size egg, so every adjustment you make hits the dome faster and harder. Learn the smaller fire, learn the heat soak, and a cooker this size will hold 250 degrees long enough to carry a pork butt through the stall.
I have been cooking competition barbecue for 18 years out of Savannah, Georgia, and I run a backyard test kitchen where two briskets go on something every week, year round. I have spent three years and six kamados figuring out which cookers hold temperature through a Georgia thunderstorm. The small ones taught me the most, because they punish sloppy vent work immediately. A big egg will forgive a lazy adjustment for ten minutes. A 13-inch kamado will not forgive you for ten seconds.
This is the how-to, not the shopping list. But there are two budget cookers below that I use to teach this workflow, and they are the two I would hand a beginner before I handed them anything expensive.
Why you should trust me
I have cooked on everything from a rusty offset I bought for $80 to a $4,000 ceramic egg, and I have kept a temperature log on every kamado that has come through my yard. Not a log of what the dome thermometer said, a log from a digital probe clipped at grate level, because the dome and the grate are two different kitchens and only one of them is cooking your meat.
I do not write about a kamado until it has run 12 brisket cooks and a full storm season in Savannah. That is the standard. It is why I will tell you a cooker is fine on a Tuesday and completely wrong for an overnight cook, in the same paragraph, and mean both.
The thing I care about is not brand. It is whether a cooker holds 250 degrees for 12 hours through weather. Everything else, the handles, the shelves, the app, is marketing.
How I picked and how I tested
The two cookers below are the small end of the market, and small is the right place to learn. I ran the same workflow on both: a full firebox of lump, a small lit pile in the center, vents set for 250 at the dome, and a probe at the grate to see how far the two numbers drifted apart. Then I cooked on them, long and short, and logged how fast each one reacted to a vent change.
The test that matters most on a small kamado is overshoot. A cooker that runs past your target by 60 degrees and takes an hour to come back down will ruin a brisket. A cooker that drifts 15 degrees and settles is a cooker you can work with.
I also checked the boring stuff, because the boring stuff is what fails. Lid seal, hinge or band tension, how the firebox sits in the base, and whether the vents can be closed down to a sliver without the fire dying out. On a small ceramic, the difference between 225 and 300 is often a quarter inch of bottom vent.
The numbers I trust: 250 degrees at the dome, stable within 15 degrees for the first two hours, is a working low-and-slow cooker. A 30 to 45 minute heat soak before the meat goes on is not optional. Grate temperature and dome temperature should be within 25 degrees of each other on a well-soaked small kamado, and if they are not, the cooker is not stabilized yet.
Two small kamados I use to teach this
Neither of these is a $4,000 egg and neither is trying to be. They are the two units I point beginners at when they want to learn vent control without risking a $90 brisket on a $900 cooker.
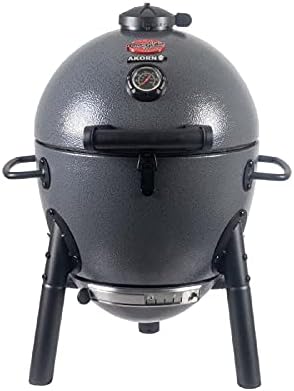
Best budget entry: Char-Griller® AKORN® Jr. Portable Kamado Charcoal Grill and Smoker with Cast Iron Grates and Locking Lid with 155 Cooking Square Inches in Ash, Model E86714
 Visit on Amazon →
Char-Griller's kamado is the best budget entry in this category, and the steel band construction holds up better than the price suggests. The locking lid and the cast iron grates are the two features that actually matter here. A locking lid means the gasket gets compressed the same way every time you close it, which is the single biggest cause of temperature drift on a cheap ceramic. Cast iron grates hold heat and give you a real sear when you want to cook hot.
At 155 cooking square inches you are cooking for two people, maybe four if you are doing chicken thighs and moving fast. This is not a packer brisket cooker. It is a two-zone, weeknight, learn-your-vents cooker, and it is honest about that.
Flaws but not dealbreakers: It is portable, which means it is light, which means it does not have the ceramic mass of a full-size egg. You will adjust vents more often than you would on a 24-inch cooker. That is the trade for the size, and it is the whole point of learning on one.
Anyone who wants to learn vent control without spending ceramic-egg money should start here.
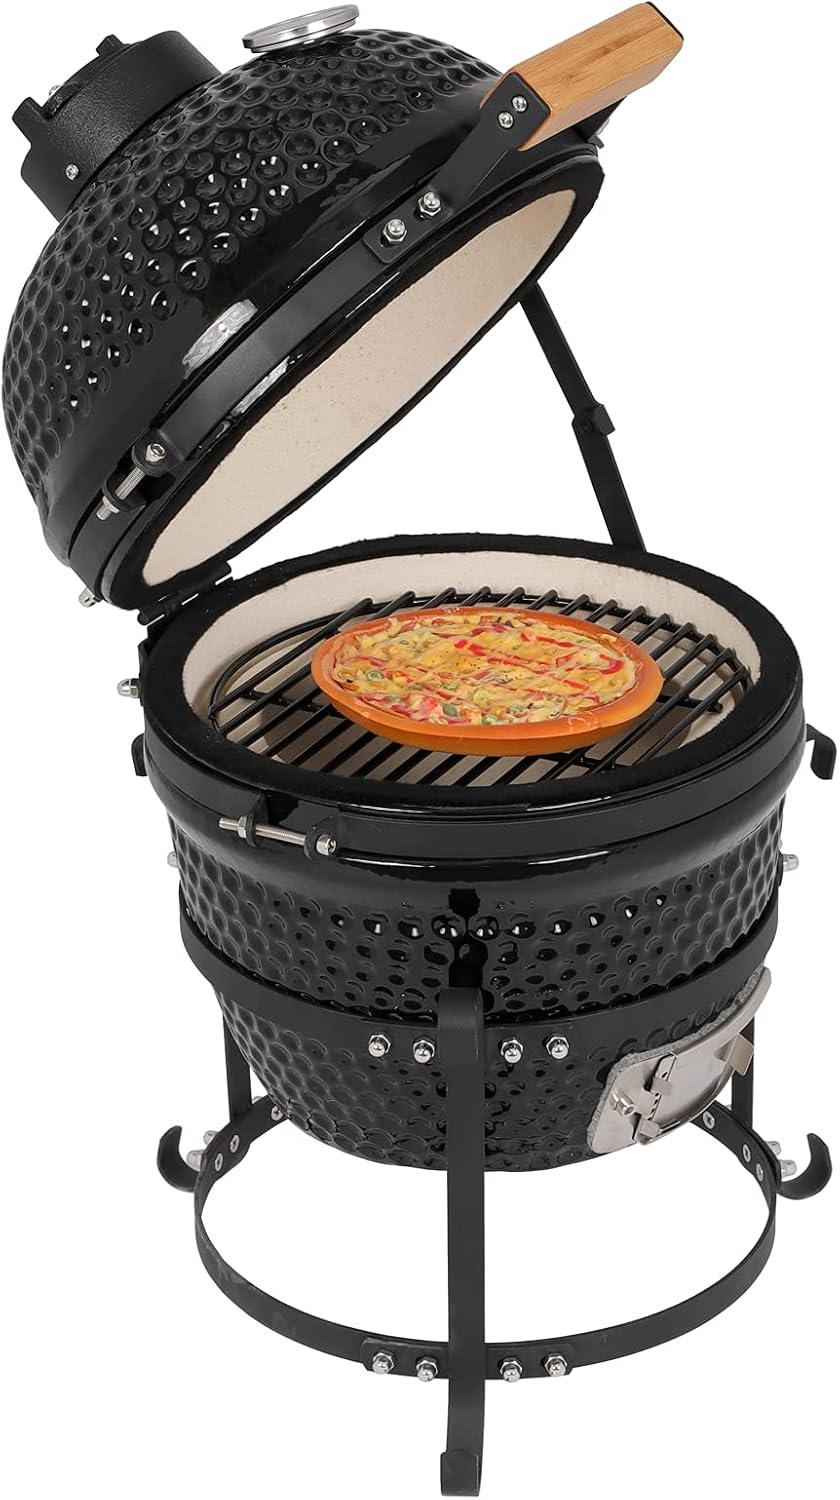
Best small ceramic: Outvita Ceramic Grill, 13" Round Kamado Charcoal Grill, Black
 Visit on Amazon →
A 13-inch round ceramic is a toy if you expect it to feed a crowd. It is a serious little cooker if you understand what it is for. The ceramic body is what separates this from a steel kettle, and ceramic thickness is what separates a good small kamado from a bad one. Two eggs at the same price can be very different pieces of ceramic, so look at the wall thickness in the firebox and the lid before you look at the badge on the front.
What a 13-inch round cooker does well: searing two steaks at 600 degrees, smoking a couple of chicken halves at 300, and holding a stable low fire for a few hours without eating a whole bag of lump. What it does not do well: an overnight cook for a party. Know which one you are buying before you buy it.
Flaws but not dealbreakers: The firebox will crack eventually. That is true of every ceramic kamado ever made, at every price, and the question is never whether it cracks but whether the warranty replaces it without a fight. Read that clause before you order, not after.
Anyone cooking for one or two who wants real ceramic insulation in a small footprint should look here.
The actual workflow
Now the part you came for. This works on any small kamado, ceramic or steel band, with a bottom vent, a top vent, and a lid.
Step one: Load the firebox. Fill the firebox to the top of the basket with lump charcoal. Not briquettes if you can help it, because briquettes ash up faster and a small cooker has less room for ash. Leave the biggest chunks at the bottom where they will burn longest. For a low-and-slow cook, fill it all the way. You control the burn with air, not with how much fuel you put in. A half-full firebox is how you end up adding charcoal at hour four and spiking the temperature.
Step two: Light a small fire. Use a chimney with a handful of lit lump, or a fire starter in the center of the pile. Do not light the whole bed. You want a small hot spot in the middle that spreads outward over hours. This is the single most important habit on a small kamado, because a small cooker with a big fire has nowhere to put the heat.
Step three: Set your vents before you walk away. Bottom vent open about a quarter of the way, top vent open about the width of a pencil. On a small ceramic, that combination usually settles somewhere near 250. Do not chase a number in the first ten minutes. You are not cooking yet, you are building a fire.
Step four: Heat soak. This is the step everyone skips. Close the lid and let the cooker run for 30 to 45 minutes before any meat goes on. Heat soak is what makes the ceramic itself hot, not just the air inside it. Skip it and your first hour of cooking is a temperature fight, because a cold ceramic wall pulls heat out of the dome and your vents are set for a cooker that is not there yet.
Step five: Dial in the dome. After the soak, look at the dome thermometer. If you are at 275, close the bottom vent a sliver. Wait 10 minutes. If you are at 240, open it a sliver. Wait 10 minutes. Small kamados react in about 10 minutes, not two. Adjusting a vent and checking it 60 seconds later is how you end up chasing the temperature all afternoon.
Step six: Add the meat and a heat deflector. On a small cooker the meat sits close to the fire, so a deflector plate between the coals and the grate is not optional for a long cook. It turns the cooker into an oven instead of a grill. Put the meat on, close the lid, and do not open it again for the first hour. Every time you lift that lid you dump the heat you spent 45 minutes building.
Step seven: Watch the first two hours. This is where a small kamado earns its keep or does not. Log the grate temperature, not just the dome. If the grate probe reads 40 degrees hotter than the dome, the fire is running hot and you should close the bottom vent a hair now, not in 30 minutes when the dome catches up.
Step eight: Shut it down with the vents. When the cook is done, close both vents all the way. A kamado is designed to choke its own fire, and the leftover lump will be reusable next time. Do not open the lid to speed the cooldown. You will lose your charcoal and possibly your eyebrows.
Where a small kamado runs out of room
A 13-inch cooker is not a smaller version of a 24-inch cooker. It is a different tool. The fire is closer to the food, the thermal mass is lower, and the margin for error is smaller in both directions. If you want to cook two briskets for a football party, this is the wrong class of cooker and no amount of technique fixes that.
The honest limits: one pork butt, not two. Chicken for four, not eight. A rack of ribs if you curl it or cut it. Searing at high heat, absolutely, and this is where a small kamado beats a big one, because it comes up to 600 degrees in half the time.
If you find yourself fighting the size every weekend, you have outgrown the cooker, and that is a fine reason to buy a bigger one. Keep the small one for weeknights.
What this all costs
Neither of these is a big-ticket purchase, and both are check-current-price items, so look them up rather than trusting a number in an article that will be stale in a month. What I can tell you is where the money actually goes and where it does not.
The cooker is the cheap part. The things that make a small kamado work are lump charcoal, a decent heat deflector, and a two-probe digital thermometer so you know your grate temperature instead of guessing from the dome. That thermometer matters more than the brand of the grill, and I would rather see you spend on that than on an accessory shelf.
Run the math over five years and a kamado is one of the cheapest ways to cook outdoors, because the ceramic does not rust out and the fuel bill is low once you learn to choke the fire and reuse your lump. The expensive part is the learning curve, and that is free if you are patient with the vents.
The 30 to 45 minute heat soak is what separates a small kamado showing 60% of what it can do from the same cooker holding a rock-steady 250 for six hours. Do it once, write down your vent positions, and you will never guess again.
That is the job. Stabilize the dome before you even think about the meat, and the cooker will do the rest.