A kamado's whole job is holding temperature. Everything else is marketing. But there is a step that happens before the first lump of charcoal ever hits the firebox, and it decides whether that temperature holds at all: kamado grill stand setup.
I have watched cooks spend four figures on ceramic and then set it on a wobbling cart with three casters touching the patio. Then they wonder why the dome seal leaks, why the fire runs hot on one side, why a $90 brisket comes out tasting like lighter fluid and regret.
The stand is not furniture. It is the foundation the whole cook sits on. Get it wrong and every vent adjustment you make is fighting a losing battle.
Why you should trust me
Eighteen years of competition barbecue, three years of it spent cycling through six kamados to find out which ones hold temperature through a Georgia thunderstorm. I cook two briskets a week, every week, year round, on a patio in Savannah where the humidity hits 90 percent in July and the afternoon storms roll in like they have an appointment.
I have replaced fireboxes, gaskets, hinge bands, and one entire stand that rusted through at the caster plates after two summers. That last one is why I care about powder coat and stainless steel more than most people care about their grill brand.
A kamado is a lifetime purchase. The stand under it should be too.
What a kamado stand actually has to do
Before you look at any specific stand, know the job description. There are six things that matter, and none of them are cosmetic.
It has to hold the weight without flexing. A large ceramic kamado with a full firebox, a plate setter, a water pan, and a 14-pound packer brisket is a serious load. If the frame flexes when you lean on the lid, the ceramic is flexing with it, and ceramic does not enjoy flexing.
It has to roll, and it has to stop rolling. You want casters for storm season and for moving the grill out from under the eaves. You want locking casters because a kamado that drifts an inch while you are running the vents takes the dome seal with it.
It has to keep the bottom vent clear. If the frame rail sits in front of the lower vent, you have built yourself a damper you cannot adjust. Check that the vent has open air around it at every caster position.
It has to store charcoal somewhere that is not the drip path. Two-tier storage is worth having. Storage that sits directly under the grease trail is not. Ash and grease make a paste that eats paint.
It has to survive humidity. Savannah will find any bare steel on a stand. Powder coat and stainless steel are not upsells here, they are the difference between a stand you keep and a stand you replace.
It has to be the right height for you. A stand that puts the dome hinge above your shoulder turns every lid check into a shoulder injury. Measure your own reach before you buy.
Stands that earn their place
Two stands cover most of the kamados people actually own. Both are built for the footprint they name, and neither one is a universal fit, so check your cart dimensions before you order.
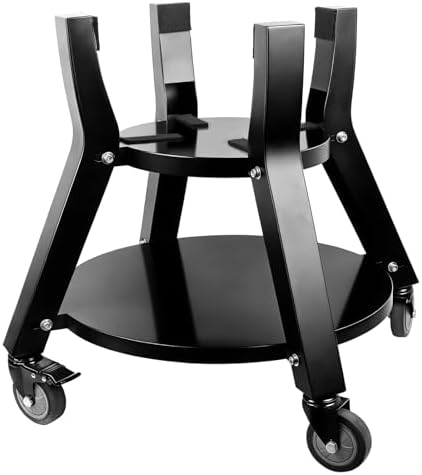
The pick for a Classic Joe: Heavy-Duty Nest for Kamado Joe Classic Joe Grill, 2-Tier Storage Stand with Locking Silent Casters, Powder-Coated Steel Stand for Classic Joe Cart
 Visit on Amazon →
This is the one I would put under a Classic Joe. The two features that matter are in the name: locking silent casters and powder-coated steel.
Locking casters solve the drift problem. Silent casters solve a different problem, the one where you roll the grill out at 5 a.m. for an overnight cook on a deck above a bedroom. Hard plastic wheels on a wood deck sound like a shopping cart full of bricks. That is not a small thing when you are trying to keep the house asleep.
The two-tier storage layout gives you a shelf for lump and a shelf for the tools you actually reach for, which keeps the chimney starter and the ash rake off the ground where they rust. Powder coat over steel is the correct finish for a humid climate, and it is the finish that holds up to ash and grease better than bare metal.
The part I would check before ordering: this stand is built around the Classic Joe cart footprint, not a generic large kamado. Measure your cart's width and depth and compare. If your kamado is a different brand in a different cradle, this is not your stand.
Worth knowing: Powder coat protects steel, but it is not armor. A nick from a dropped charcoal chimney will start rusting in a Savannah summer. Touch up chips with matching paint the same week you find them.
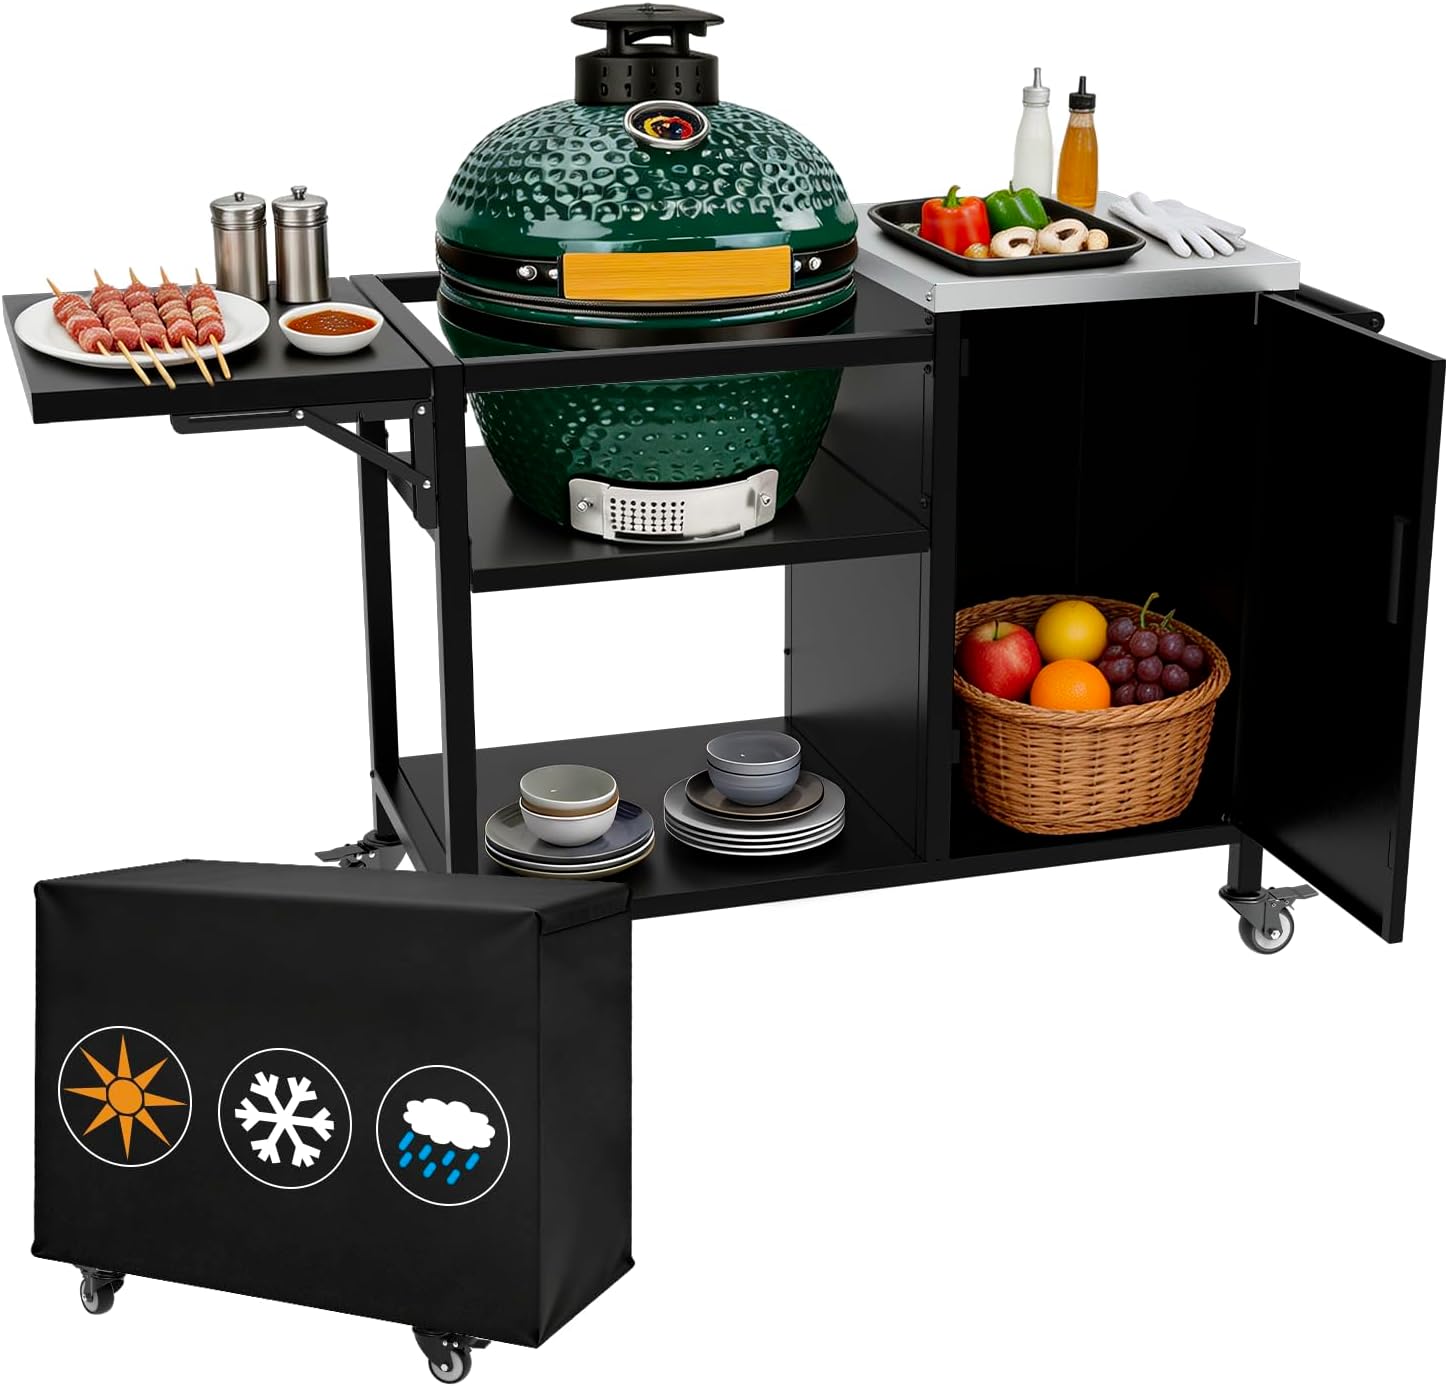
The pick for a Junior or a small egg: Big Green Egg Stand,5-Duty Storage,Stainless Steel Top,400Lbs,kamado joe jr
 Visit on Amazon →
This stand is listed for the Big Green Egg and the Kamado Joe Jr, which tells you it is aimed at the smaller end of the ceramic world. The listing rates the top at 400 pounds, which is far more capacity than a Junior or a small egg will ever ask of it, and that headroom is exactly what you want in a stand. A stand that is barely adequate at rest is not adequate when you lean on the lid to check a brisket.
The stainless steel top is the reason I would point a coastal cook here. Stainless does not care about rain, grease, or the salt air that comes off the water twenty minutes from my house. It wipes clean instead of staining, and it does not blister the way painted steel does when a hot ash pan gets set down on it.
Because the listing covers two different cookers, do the footprint check twice. The Junior and a small Big Green Egg are close in size but not identical, and a stand that fits one with a little slop may fit the other snugly. Measure, then order.
Worth knowing: Inspect the caster hardware when the stand arrives and after the first cook. Heat cycles and weight settling will loosen fasteners on any stand, and a loose caster is how a kamado starts to lean.
How to set up a kamado stand, step by step
Now the actual work. Budget an hour, and get a second set of hands for the lift. Ceramic does not forgive a dropped corner.
Step one: Pick the spot before you build anything. A kamado wants a hard, level surface. Pavers, concrete, a deck with real joists under it. On grass, the casters will sink unevenly the first time it rains, and an unlevel kamado burns unevenly for the rest of its life. Keep it out from directly under the eaves, away from vinyl siding, and downwind of anything you do not want smelling like smoke.
Step two: Assemble on cardboard, upside down. Lay the frame on flattened cardboard so you do not scratch the powder coat on the driveway before the stand ever holds a grill. Casters go on last, and they go on tight. If the instructions tell you to torque them, torque them.
Step three: Set it upright and check that all four casters touch. This is the step everyone skips and the step that matters most. Put a level on the frame in both directions. If one caster is hanging in the air, the frame is twisted, and a twisted frame means a twisted kamado. Shim or adjust before you go further.
Step four: Lock the casters. Every one of them. A stand with two locked wheels and two free ones will pivot when you bump it, and pivoting is how a dome gets knocked out of alignment.
Step five: Set the kamado with two people. Lift from the base of the ceramic, never from the hinge band and never from the lid. Lower it straight down into the cradle. If it does not sit flush, stop and find out why before you let go.
Step six: Check the lid and gasket after it settles. Open and close the dome slowly. It should meet the gasket evenly all the way around with a light, consistent feel. If one side touches first, the stand or the surface under it is off, and you fix that now, not after a cook.
Step seven: Confirm the bottom vent is clear at every position. Roll the stand through its full range on the patio and look at the lower vent each time. If a rail blocks it, reposition the stand or rotate the kamado in the cradle.
Step eight: Re-check every fastener after the first cook. Heat, weight, and settling loosen things. Ten minutes with a wrench after cook number one saves you a season of wobble.
Step nine: Heat soak before the first real cook. Thirty to forty-five minutes with the vents set and the dome stabilizing at 250. Skipping the heat soak is how briskets get ruined, and it is also how you find out whether the stand moves when the ceramic expands.
Mistakes that cost you a gasket
Rolling a kamado while it is hot. Ceramic under heat is not the moment to test your caster hardware. Move it cold, or do not move it.
Storing forty pounds of lump on the top shelf. Storage tiers are for access, not for stacking. Heavy bags go low, tools go high.
Ignoring a nick in the powder coat. Rust spreads under paint where you cannot see it, and by the time you see it, the caster plate is compromised.
Setting the stand on gravel or bare dirt. Four casters on uneven ground means one caster carrying the load. That is how frames bend.
Forgetting the caster locks after a storm. A locked kamado does not wander. An unlocked one does, and it usually picks the moment you are carrying a hot plate setter.
Storm season and the long haul
I cook through Georgia thunderstorms, and I have learned what a kamado stand needs in weather. If you can roll it under cover, do it, because a stand that stays dry lasts twice as long as one that does not. If you cannot, lock the casters and cover the whole rig so water is not sitting in the storage tiers.
Once a season, walk the stand. Look at every weld, every caster plate, every bolt. Wipe the stainless top with a damp cloth instead of letting grease bake on. Touch up powder coat chips. Tighten what has loosened.
That is a fifteen-minute job twice a year. It is the cheapest maintenance you will ever do on a cooker that costs what a kamado costs.
What actually matters after the stand is set
The stand is the foundation, not the cook. Once it is level, locked, and clear of the vent, the rest is vent control, which is 90 percent of kamado cooking. Learn the top and bottom vents before you buy a temperature controller. Set the fire, let the dome heat soak, and make small adjustments instead of chasing the needle.
A steady stand makes steady temperature possible. It does not make it automatic. Nothing about a kamado is set and forget, and anybody who tells you otherwise has never cooked a brisket through a rainstorm at two in the morning.
Get the foundation right, keep it dry, check the bolts, and the ceramic will do the rest of the work for you for the next twenty years.